
As much as I love beauty products, I also want to start introducing more content over on this blog. I recently went back to look at my early blog posts and saw my old DIYs, which were quite hilarious, but reminded me of how much I used to love making crafty Youtube videos and blog posts. These will be less frequent, but I'm excited to revisit my passion for DIY!
Today I wanted to share how I vamped up a new rug I purchased to go underneath our coffee table. The rug itself is from H&M Home and I paid $17 CAD for it on sale. Initially I thought it would look great in our living room but once it was in, I thought it was a bit boring and needed something to jazz it up, so I decided to add some homemade poms poms to the ends to give it some character. This is more of an idea than a true DIY but keep on reading if you want to see how I made the poms poms!

Firstly, I took some medium thick yarn I had lying around and wrapped them around three fingers. I played around with this and experimented with the size of the poms poms I wanted but found that three fingers width was perfect for my rug. I did about 20-25 loops and cut the yarn, making 14 individual looped rolls in total. Note: The more loops you do, the fluffier your pom pom will be. Also, if you are making a bigger pom pom, you will definitely need to do more loops.


Once all of the loops were made, I took another longer piece of yarn and centered it behind each loop bundle. I tied the yarn with a double knot to bring all of the loops together and then cut all of the loops with scissors to create the pom pom ends.
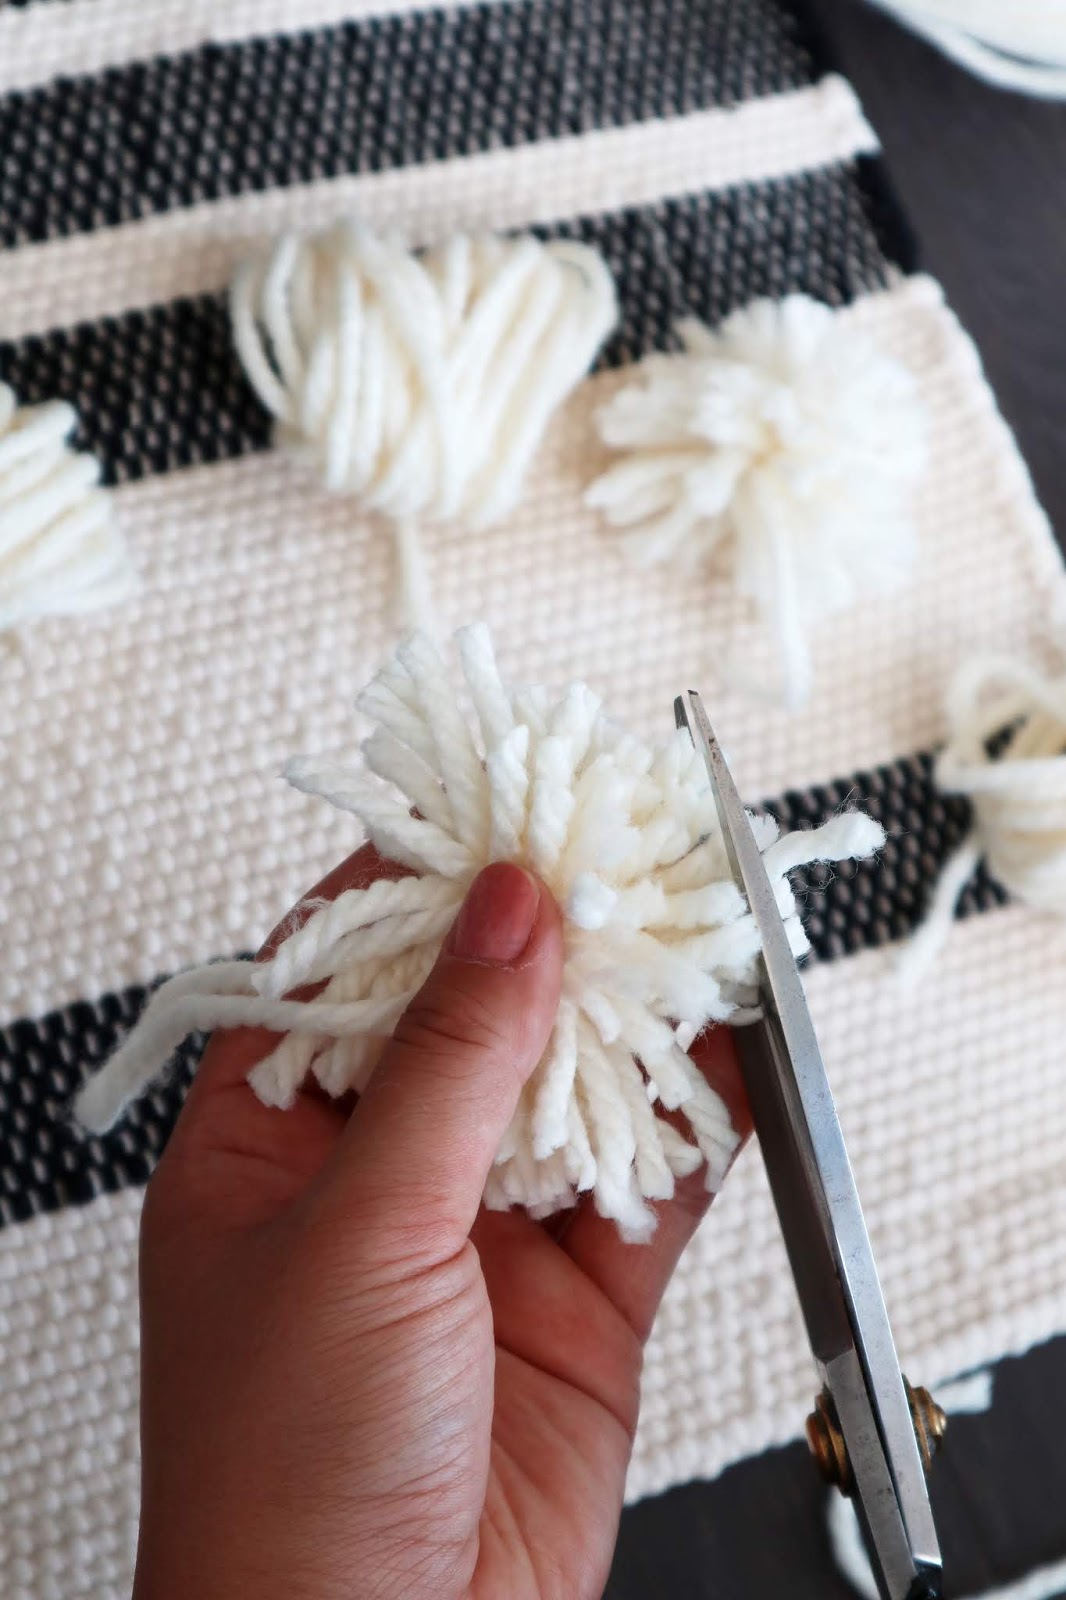
Since my loops weren't perfect and the same size, I went in and trimmed the ends so that everything was relatively even. I was able to adjust the poms poms and make them smaller at this point too. I did however, leave the yarn that I used to tie the loops together long, as you'll see in the next photo.

I ended up making 14 poms poms altogether, allowing for 7 on each side of the rug. I spaced them out evenly and then hot-glued the longer yarn ends down. I really should have hand sewn these on but let's be honest - I was incredibly lazy and the hot glue held so well anyways! The longer yarn ends were trimmed and then I was finished!


What do you think of the rug? I love how it turned out and now it suits the space so much better! This was a super simple and quick DIY, and now I want to add poms poms to everything in our apartment... Let me know if you try this DIY to anything you own - I'd love to see it!
Have a great week!
Nancy


My friend mentioned to me your blog, so I thought I’d read it for myself. Very interesting insights, will be back for more! area rug cleaning
ReplyDeleteI really appreciate how you have explained the rug cleaning services so well. SoHo Rug Cleaning is offering top-notch rug cleaning NYC services at affordable prices.
ReplyDeleteThe reason for cover stair tracks is to shield your stairs from mileage and harm through scratching and chipping, from typical consistently use. Stair tracks and stair sprinters are doubtlessly one of the most significant part of staircase security.Carpet Cleaning Brooklyn NY
ReplyDelete